Trying to record your screen in MarketScale Studio? Keep reading to learn how!
MarketScale Studio's screen recording feature is incredibly versatile and user-friendly, making it an essential asset for businesses of all sizes.
Whether you're creating walkthroughs for software or websites, this feature allows you to capture every step in real-time, providing a clear and comprehensive guide for your audience. It's like having a virtual tour guide that can navigate your digital product, making it more accessible and easier to understand for users.
Moreover, this feature is not just limited to creating content. It also plays a significant role in enhancing internal training and customer support. You can record step-by-step processes, making it easier for your team to learn new tools or for your customers to troubleshoot issues.
In terms of marketing, imagine being able to show your customers exactly how your product works through a video, enhancing their understanding and boosting their confidence in your product.
Regardless of the size of your business or the industry you're in, the screen recording feature in MarketScale Studio is designed to be easy to use. So, whether you're looking to create instructional videos or aiming to streamline communication, this feature is ready to assist you.
Let's dive in and discover more about how you can leverage this tool to its full potential.
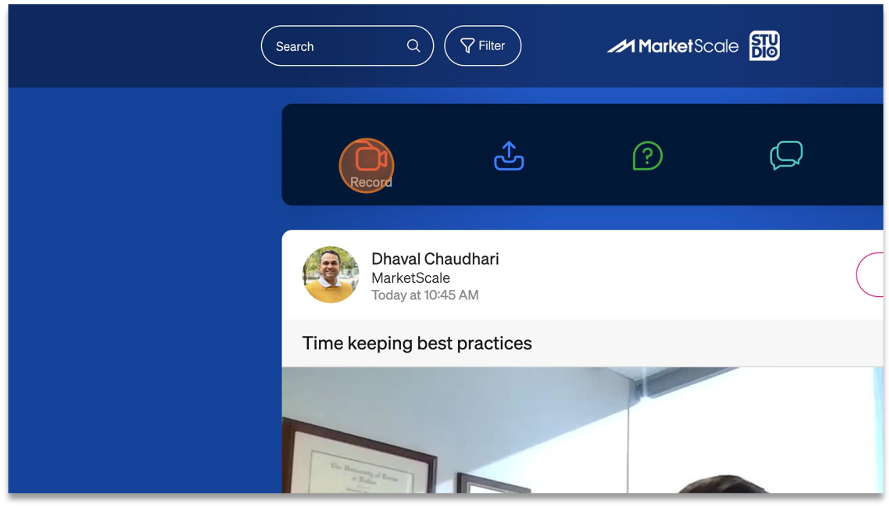
1. Starting from your dashboard, you'll see a red record icon on the far left. Clicking this will take you to the "Record" feature on Studio, which is designed to make capturing your screen as easy as possible.
2. At the bottom of the screen, you'll find icons for changing recording settings. The last icon on the far right, which looks like an arrow inside a box, is the "Share screen" button. Clicking this will allow you to share your screen and start recording.
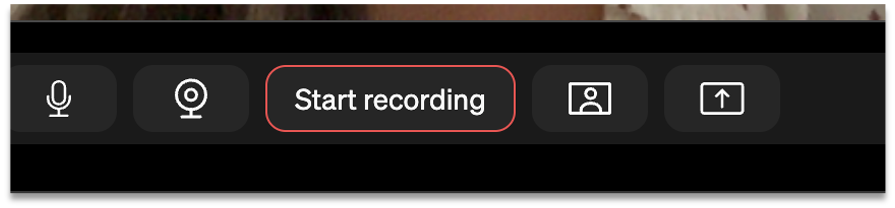
3. After clicking the "Share screen" button, you'll be prompted to choose which screen you'd like to share. Once you've made your selection, click the "Share" button to begin.

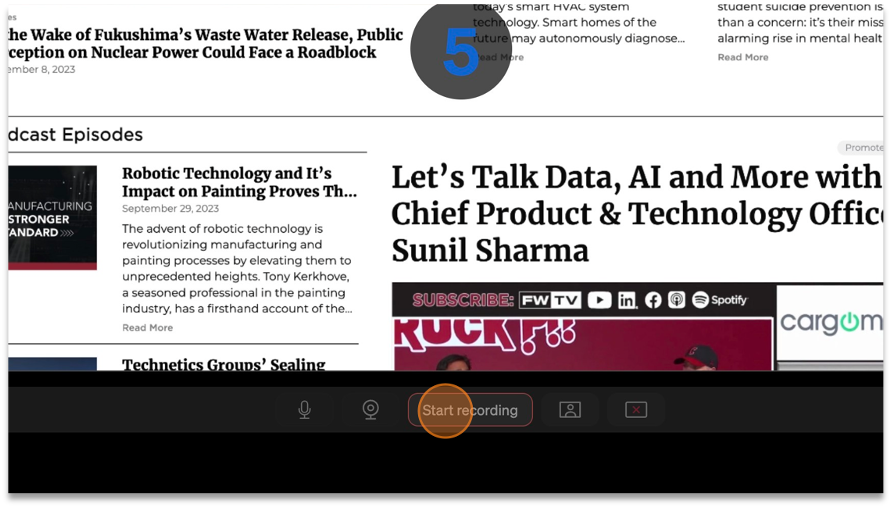
4. To start your recording, click the "Start Recording" button at the bottom of the page. A 5-second timer will count down, and then Studio will begin recording the window you've selected. You can scroll, click, and speak through your content as both your movements and audio are being recorded.
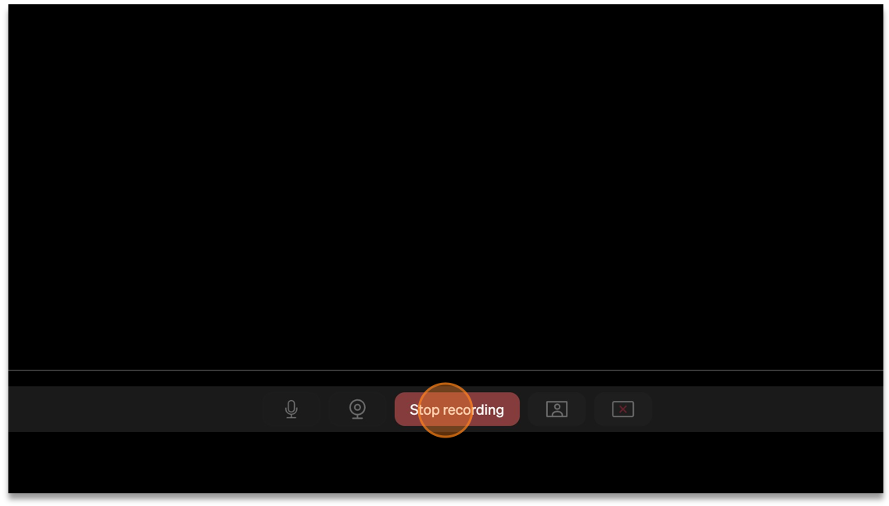
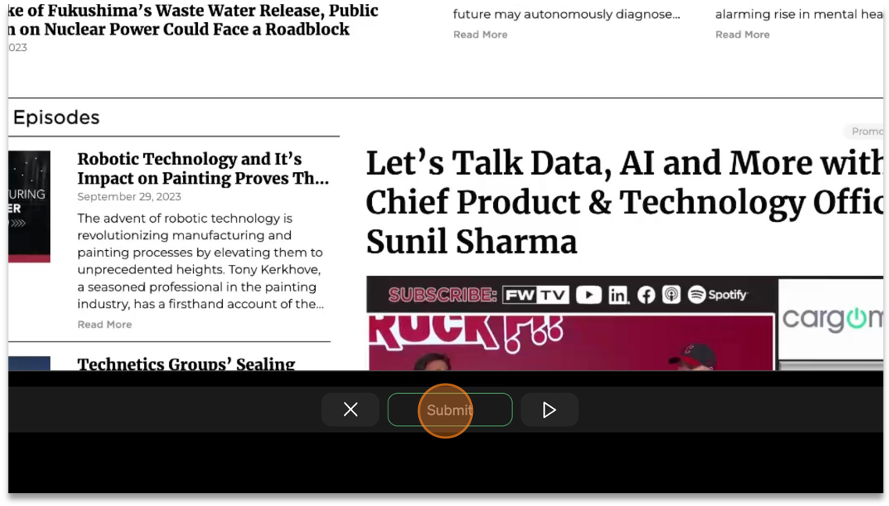
5. Once you've finished sharing your screen, you can click on the boxed-in red x icon on the far right. When you are done recording the video in its entirety, click "Stop recording."
6. After stopping the recording, you can review the content by clicking the "Play" button on the right. If you're happy with the recording, click "Submit". If you'd like to try again, click the "X" button on the left. Remember, our team of editors can edit the video and audio afterwards, so don't worry about small mistakes.
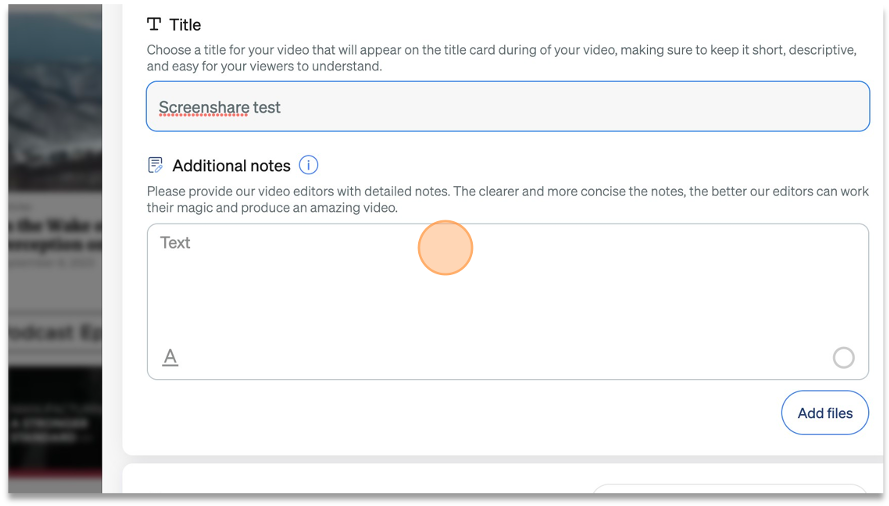
7. Next, you will be prompted to enter a title that describes your content. You can also provide additional notes for our editors, such as information on editing, style, or any other details you'd like them to note.
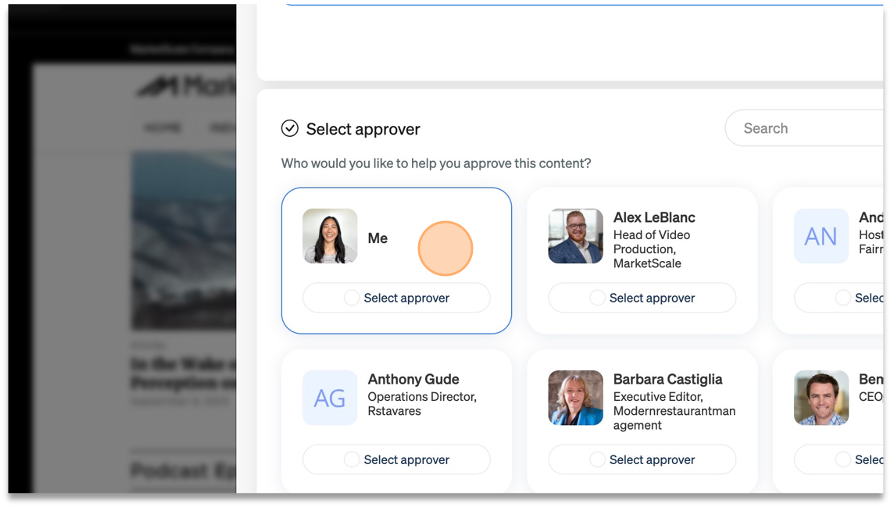
8. You'll then need to select an approver. This person will verify that the content meets quality, brand, and content requirements before it's published. Consider who on your team will be best suited to review and approve the final video.
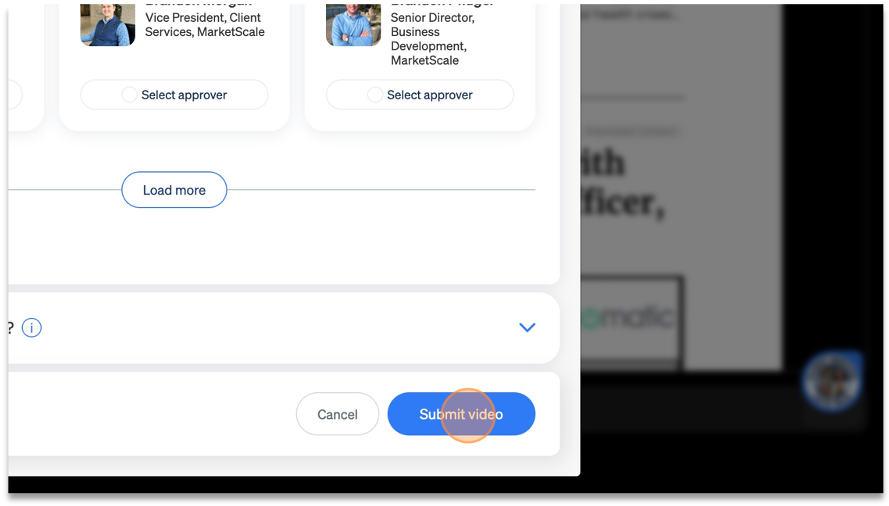
9. Finally, click "Submit video" to send your recording for approval.
Congratulations! You have successfully recorded your screen in studio.